Flutter Weather Tutorial

다음 튜토리얼에서는 여러 Bloc을 관리하여 동적인 테마를 구현하고 새로 고침을 하는 등의 방법을 보여주는 Flutter에서 Weather 앱을 작성하려고 합니다. 우리의 날씨 응용 프로그램은 API에서 실제 데이터를 가져 와서 응용 프로그램을 세 가지 레이어 (데이터, 비즈니스 로직 및 프리젠 테이션)로 분리하는 방법을 보여줍니다.
준비 (Setup)
우리는 새로운 Flutter 프로젝트를 만드는 것으로 시작합니다.
flutter create flutter_weather
그러면 pubspec.yaml의 내용을 다음과 같이 변경 할 수 있습니다.
name: flutter_weather
description: A new Flutter project.

version: 1.0.0+1

environment:
  sdk: ">=2.0.0-dev.68.0 <3.0.0"

dependencies:
  flutter:
    sdk: flutter
  flutter_bloc: ^0.13.0
  http: ^0.12.0
  equatable: ^0.2.0

dev_dependencies:
  flutter_test:
    sdk: flutter

flutter:
  uses-material-design: true
  assets:
    - assets/
Note: 앱에 일부 애셋 (날씨 타입 아이콘)을 추가 할 예정이므로 애셋 폴더를 pubspec.yaml에 포함시켜야 합니다. 먼저 프로젝트의 루트에 assets 폴더를 만드세요.
모든 의존성을 설치하십시오.
flutter packages get
REST API
이 애플리케이션에서는 metaweather API를 사용합니다.
We’ll be focusing on two endpoints:
우리는 두 가지 엔드포인트(endpoints)에 초점을 맞출 것입니다 :
/api/location/search/?query=$city주어진 도시 이름에 대한locationId가져 오기/api/location/$locationId주어진locationId에 대한 날씨 정보를 가져 오기
브라우저에서 https://www.metaweather.com/api/location/search/?query=london을 열면 다음과 같은 응답이 표시됩니다.
[
  {
    "title": "London",
    "location_type": "City",
    "woeid": 44418,
    "latt_long": "51.506321,-0.12714"
  }
]
그러면 우리는 where-on-earth-id (woeid)를 얻고 그것을 사용하여 location API에 도달 할 수 있습니다.
브라우저에서 https://www.metaweather.com/api/location/44418로 이동하면 런던의 날씨에 대한 응답을 볼 수 있습니다. 다음과 같이 보일 것입니다:
{
  "consolidated_weather": [
    {
      "id": 5565095488782336,
      "weather_state_name": "Showers",
      "weather_state_abbr": "s",
      "wind_direction_compass": "WNW",
      "created": "2019-02-10T19:55:02.434940Z",
      "applicable_date": "2019-02-10",
      "min_temp": 3.75,
      "max_temp": 6.883333333333333,
      "the_temp": 6.885,
      "wind_speed": 10.251177687940428,
      "wind_direction": 288.4087075064449,
      "air_pressure": 998.9649999999999,
      "humidity": 79,
      "visibility": 8.241867493835997,
      "predictability": 73
    },
    {
      "id": 5039805855432704,
      "weather_state_name": "Light Cloud",
      "weather_state_abbr": "lc",
      "wind_direction_compass": "NW",
      "created": "2019-02-10T19:55:02.537745Z",
      "applicable_date": "2019-02-11",
      "min_temp": 1.7699999999999998,
      "max_temp": 8.986666666666666,
      "the_temp": 8.105,
      "wind_speed": 5.198548786091227,
      "wind_direction": 319.24869874195554,
      "air_pressure": 1027.4,
      "humidity": 75,
      "visibility": 11.027785234232084,
      "predictability": 70
    },
    {
      "id": 6214207016009728,
      "weather_state_name": "Heavy Cloud",
      "weather_state_abbr": "hc",
      "wind_direction_compass": "SW",
      "created": "2019-02-10T19:55:02.736577Z",
      "applicable_date": "2019-02-12",
      "min_temp": 3.2699999999999996,
      "max_temp": 11.783333333333333,
      "the_temp": 10.425,
      "wind_speed": 6.291005350509027,
      "wind_direction": 225.7496998927606,
      "air_pressure": 1034.9099999999999,
      "humidity": 77,
      "visibility": 9.639331305177762,
      "predictability": 71
    },
    {
      "id": 6548160117735424,
      "weather_state_name": "Heavy Cloud",
      "weather_state_abbr": "hc",
      "wind_direction_compass": "SSW",
      "created": "2019-02-10T19:55:02.687267Z",
      "applicable_date": "2019-02-13",
      "min_temp": 3.526666666666667,
      "max_temp": 11.476666666666667,
      "the_temp": 10.695,
      "wind_speed": 6.524550068392587,
      "wind_direction": 203.1296143014564,
      "air_pressure": 1035.775,
      "humidity": 76,
      "visibility": 12.940987135130836,
      "predictability": 71
    },
    {
      "id": 4957149578919936,
      "weather_state_name": "Light Cloud",
      "weather_state_abbr": "lc",
      "wind_direction_compass": "SSE",
      "created": "2019-02-10T19:55:03.487370Z",
      "applicable_date": "2019-02-14",
      "min_temp": 3.4500000000000006,
      "max_temp": 12.540000000000001,
      "the_temp": 12.16,
      "wind_speed": 5.990352212916568,
      "wind_direction": 154.1901674720193,
      "air_pressure": 1035.53,
      "humidity": 71,
      "visibility": 13.873665294679075,
      "predictability": 70
    },
    {
      "id": 5277694765826048,
      "weather_state_name": "Light Cloud",
      "weather_state_abbr": "lc",
      "wind_direction_compass": "S",
      "created": "2019-02-10T19:55:04.800837Z",
      "applicable_date": "2019-02-15",
      "min_temp": 3.4,
      "max_temp": 12.986666666666666,
      "the_temp": 12.39,
      "wind_speed": 5.359238182348418,
      "wind_direction": 176.84978678797177,
      "air_pressure": 1030.96,
      "humidity": 77,
      "visibility": 9.997862483098704,
      "predictability": 70
    }
  ],
  "time": "2019-02-10T21:49:37.574260Z",
  "sun_rise": "2019-02-10T07:24:19.235049Z",
  "sun_set": "2019-02-10T17:05:51.151342Z",
  "timezone_name": "LMT",
  "parent": {
    "title": "England",
    "location_type": "Region / State / Province",
    "woeid": 24554868,
    "latt_long": "52.883560,-1.974060"
  },
  "sources": [
    {
      "title": "BBC",
      "slug": "bbc",
      "url": "http://www.bbc.co.uk/weather/",
      "crawl_rate": 180
    },
    {
      "title": "Forecast.io",
      "slug": "forecast-io",
      "url": "http://forecast.io/",
      "crawl_rate": 480
    },
    {
      "title": "HAMweather",
      "slug": "hamweather",
      "url": "http://www.hamweather.com/",
      "crawl_rate": 360
    },
    {
      "title": "Met Office",
      "slug": "met-office",
      "url": "http://www.metoffice.gov.uk/",
      "crawl_rate": 180
    },
    {
      "title": "OpenWeatherMap",
      "slug": "openweathermap",
      "url": "http://openweathermap.org/",
      "crawl_rate": 360
    },
    {
      "title": "Weather Underground",
      "slug": "wunderground",
      "url": "https://www.wunderground.com/?apiref=fc30dc3cd224e19b",
      "crawl_rate": 720
    },
    {
      "title": "World Weather Online",
      "slug": "world-weather-online",
      "url": "http://www.worldweatheronline.com/",
      "crawl_rate": 360
    },
    {
      "title": "Yahoo",
      "slug": "yahoo",
      "url": "http://weather.yahoo.com/",
      "crawl_rate": 180
    }
  ],
  "title": "London",
  "location_type": "City",
  "woeid": 44418,
  "latt_long": "51.506321,-0.12714",
  "timezone": "Europe/London"
}
이제 데이터가 어떻게 보이는지 알았으므로 필요한 데이터 모델을 만들어 보겠습니다.
Weather 데이터 모델을 만들자 (Creating Out Weather Data Model)
weather API가 며칠간의 날씨를 반환하더라도, 우리는 간단하게 하기 위해 오늘의 날씨에 대해서만 걱정할 것입니다.
우리의 모델을 위한 lib/models을 폴더를 만들고 weather.dart라는 이름의 파일을 만들어서 우리의 Weather 클래스에 대한 우리의 데이터 모델을 저장할 것입니다. lib/models의 다음은 models.dart라는 파일을 만듭니다. 이 파일은 우리가 모든 모델을 내보낼 우리의 파일입니다.
Imports
우선 클래스에 대한 의존성을 가져와야 합니다. weather.dart의 맨 위에 다음을 추가하세요:
import 'package:equatable/equatable.dart';
equatable:==연산자를 오버라이드 할 필요없이 객체 들간의 비교를 허용하는 패키지
WeatherCondition 열거자를 만들자 (Create WeatherCondition Enum)
다음으로 가능한 모든 기상 조건(weather condition)에 대한 열거자를 만듭니다. 다음 줄에 enum을 추가해 보겠습니다.
이러한 조건은 metaweather API의 정의에서 비롯됩니다.
enum WeatherCondition {
  snow,
  sleet,
  hail,
  thunderstorm,
  heavyRain,
  lightRain,
  showers,
  heavyCloud,
  lightCloud,
  clear,
  unknown
}
Weather Model을 만들어요 (Create Weather Model)
다음으로 우리는 API에서 반환 된 날씨 객체용으로 정의된 데이터 모델이 될 클래스를 생성해야 합니다. API에서 데이터의 서브셋을 추출하여 Weather 모델을 만듭니다. WeatherCondition 열거자 아래의weather.dart 파일에 이것을 추가하세요.
class Weather extends Equatable {
  final WeatherCondition condition;
  final String formattedCondition;
  final double minTemp;
  final double temp;
  final double maxTemp;
  final int locationId;
  final String created;
  final DateTime lastUpdated;
  final String location;

  Weather({
    this.condition,
    this.formattedCondition,
    this.minTemp,
    this.temp,
    this.maxTemp,
    this.locationId,
    this.created,
    this.lastUpdated,
    this.location,
  }) : super([
          condition,
          formattedCondition,
          minTemp,
          temp,
          maxTemp,
          locationId,
          created,
          lastUpdated,
          location,
        ]);

  static Weather fromJson(dynamic json) {
    final consolidatedWeather = json['consolidated_weather'][0];
    return Weather(
      condition: _mapStringToWeatherCondition(
          consolidatedWeather['weather_state_abbr']),
      formattedCondition: consolidatedWeather['weather_state_name'],
      minTemp: consolidatedWeather['min_temp'] as double,
      temp: consolidatedWeather['the_temp'] as double,
      maxTemp: consolidatedWeather['max_temp'] as double,
      locationId: json['woeid'] as int,
      created: consolidatedWeather['created'],
      lastUpdated: DateTime.now(),
      location: json['title'],
    );
  }

  static WeatherCondition _mapStringToWeatherCondition(String input) {
    WeatherCondition state;
    switch (input) {
      case 'sn':
        state = WeatherCondition.snow;
        break;
      case 'sl':
        state = WeatherCondition.sleet;
        break;
      case 'h':
        state = WeatherCondition.hail;
        break;
      case 't':
        state = WeatherCondition.thunderstorm;
        break;
      case 'hr':
        state = WeatherCondition.heavyRain;
        break;
      case 'lr':
        state = WeatherCondition.lightRain;
        break;
      case 's':
        state = WeatherCondition.showers;
        break;
      case 'hc':
        state = WeatherCondition.heavyCloud;
        break;
      case 'lc':
        state = WeatherCondition.lightCloud;
        break;
      case 'c':
        state = WeatherCondition.clear;
        break;
      default:
        state = WeatherCondition.unknown;
    }
    return state;
  }
}
우리는 Equatable을 확장하여 Weather 인스턴스를 비교할 수 있습니다. 기본적으로 등호 연산자는 this와 other가 같은 인스턴스 인 경우에만 true를 반환합니다.
여기에 많은 일이 일어나지 않습니다. 우리는 Weather 데이터 모델을 정의하고 fromJson 메소드를 구현하여 API 응답 본문에서 Weather 인스턴스를 생성하고 원시 문자열을 열거형의 WeatherCondition에 매핑하는 메소드를 만들 수 있습니다.
배럴에서 내보내기 (Export in Barrel)
이제이 클래스를 배럴 파일로 내보내야 합니다. lib/models/models.dart를 열고 다음 코드 줄을 추가해야 합니다:
export 'weather.dart';
데이터 제공자 (Data Provider)
다음으로 Weather API에 http 요청을 하는 WeatherApiClient를 빌드 해야 합니다.
WeatherApiClient는 우리의 애플리케이션 아키텍처 (데이터 제공자)에서 가장 낮은 계층이며, Google API에서 직접 데이터를 가져 오는 것이 책임입니다.
As we mentioned earlier, we are going to be hitting two endpoints so our WeatherApiClient needs to expose two public methods:
앞에서 언급했듯이, 우리는 두 개의 엔드포인트(endpoints)에서 가져오기 때문에, 우리의 WeatherApiClient는 두 개의 공개 메소드를 노출해야합니다.
getLocationId(String city)fetchWeather(int locationId)
Weather API Client를 만들자 (Creating our Weather API Client)
이 애플리케이션 레이어를 저장소 레이어 (repository layer)이라고 하며 repositories에 대한 폴더를 만듭니다. lib/의 내부에 repositories 폴더를 만들고 weather_api_client.dart 파일을 만듭니다.
배럴을 추가하자 (Adding a Berrel)
우리 모델에서 했던 것과 마찬가지로, 우리 저장소를위한 배럴 파일을 만들어 보자. lib/repositories 내부는 repositories.dart 파일을 추가하고 지금은 비워 둡니다.
models: 마지막으로 우리가 만든 Weather 모델을 가져옵니다.
WeatherApiClient 클래스를 만들자 (Create Our WeatherApiClient class)
클래스를 만들겠습니다. 아래를 따라하세요:
class WeatherApiClient {
  static const baseUrl = 'https://www.metaweather.com';
  final http.Client httpClient;

  WeatherApiClient({
    @required this.httpClient,
  }) : assert(httpClient != null);
}
여기서는 기본 URL에 대한 상수를 만들고 httpClient를 인스턴스화합니다. 그런 다음 생성자를 생성하고 httpClient의 인스턴스를 삽입해야 합니다. 누락 된 의존성이 표시됩니다. 파일의 맨 위에 추가해 보겠습니다.
import 'package:meta/meta.dart';
import 'package:http/http.dart' as http;
meta: Dart SDK와 함께 제공되는 도구에서 사용할 수 있는 annotation을 정의합니다.http: HTTP 요청을 작성하기 위한 조합 가능(composable) 하고Future기반의 라이브러리.
getLocation 메소드 추가하기 (Add getLocation Method)
이제 주어진 도시에 대한 locationId를 얻을 수 있는 첫 번째 공개 메소드를 추가해 보겠습니다. 생성자 아래에서 다음을 추가하십시오.
Future<int> getLocationId(String city) async {
  final locationUrl = '$baseUrl/api/location/search/?query=$city';
  final locationResponse = await this.httpClient.get(locationUrl);
  if (locationResponse.statusCode != 200) {
    throw Exception('error getting locationId for city');
  }

  final locationJson = jsonDecode(locationResponse.body) as List;
  return (locationJson.first)['woeid'];
}
여기서는 간단한 HTTP 요청을 작성한 다음 응답을 리스트로 디코딩하는 것입니다. 디코딩에 관해서는jsonDecode가 우리가 import 해야 할 의존성 함수라는 것을 알 수 있습니다. 파일의 상단에 있는 다른 import 위치 쯤에 추가하세요:
import 'dart:convert';
dart:convert: JSON 및 UTF-8을 포함하여 다른 데이터 표현간에 변환하기 위한 인코더와 디코더.
fetchWeather 메소드 추가하기 (Add fetchWeather Method)
다음으로 metaweather API를 액세스하기 위한 다른 방법을 추가해 보겠습니다. 도시는 주어진 locationId에 따라 날씨를 얻을 것입니다. 방금 구현한 getLocationId 메소드 아래에 다음을 추가해 보겠습니다.
Future<Weather> fetchWeather(int locationId) async {
  final weatherUrl = '$baseUrl/api/location/$locationId';
  final weatherResponse = await this.httpClient.get(weatherUrl);

  if (weatherResponse.statusCode != 200) {
    throw Exception('error getting weather for location');
  }

  final weatherJson = jsonDecode(weatherResponse.body);
  return Weather.fromJson(weatherJson);
}
Here again we are just making a simple HTTP request and decoding the response into JSON. You’ll notice we again need to import a dependency, this time our Weather model. At the top of the file, go ahead and import it like so:
여기서도 간단한 HTTP 요청을 만들고 응답을 JSON으로 디코딩합니다. 의존성을 다시 import 해야 한다는 것을 알아 챌 것입니다. 이번에는 Weather모델 입니다. 파일의 맨 위에서 다음과 같이 가져옵니다.
import 'package:flutter_weather/models/models.dart';
export WeatherApiClient
이제 두 가지 메소드를 가진 클래스를 만들었으니 이제 배럴 파일로 내보내야 합니다. repositories.dart의 내부에서 다음을 추가하십시오 :
export 'weather_api_client.dart';
다음에는 무엇을 합니까?
우리는 우리의 DataProvider를 완성 시켰습니다. 그래서 우리의 app 구조의 다음 레이어인 저장소 레이어로 이동할 시간입니다.
저장소 (Repository)
WeatherRepository는 클라이언트 코드와 데이터 제공자(data provider) 사이의 추상화 역할을 하기 때문에 피쳐를 구현해야 하는 개발자가 데이터의 출처를 알 필요가 없습니다. 우리의WeatherRepository는 방금 생성한WeatherApiClient에 의존 할 것이고getWeather(String city)라고 하는 하나의 공개 메소드를 노출시킬 것입니다. 누구도 후드 아래에서 두개의 API 호출(locationId와Weather)을 알아야 할 필요가 없습니다. 어느 누구도 관심을 가져야 할 피요가 없습니다. 우리가 관심을 갖는 것은 주어진 도시에 대한 ‘Weather’를 얻는 것입니다.
WeatherRepository를 만들자 (Creating Out Weather Repository)
이 파일은 repository 폴더에 둘것입니다. 그래서 weather_repository.dart라는 파일을 만들어서 편집하겠습니다.
우리의 WeatherRepository는 아주 간단하며 다음과 같이 보일 것입니다:
import 'dart:async';

import 'package:meta/meta.dart';

import 'package:flutter_weather/repositories/weather_api_client.dart';
import 'package:flutter_weather/models/models.dart';

class WeatherRepository {
  final WeatherApiClient weatherApiClient;

  WeatherRepository({@required this.weatherApiClient})
      : assert(weatherApiClient != null);

  Future<Weather> getWeather(String city) async {
    final int locationId = await weatherApiClient.getLocationId(city);
    return await weatherApiClient.fetchWeather(locationId);
  }
}
배럴에서 WeatherRepository를 export 하기 (Export WeatherRepository in Barrel)
repositories.dart를 열고 다음과 같이 export 하세요:
export 'weather_repository.dart';
우리는 이제 비즈니스 로직 레이어로 이동하여 WeatherBloc을 구축 할 준비가 되었습니다.
Business Logic (Bloc)
우리의
WeatherBloc은WeatherEvents를 수신하여WeatherStates로 변환합니다.WeatherRepository에 의존하여 사용자가 원하는 도시를 입력 하여Weather를 검색 할 수 있습니다.
첫 Bloc를 만들자 (Creating Out First Bloc)
이 튜토리얼에서는 Blocs를 몇개 작성해, blocs라고 불리는 lib 내에 폴더를 작성하도록 합니다. 우리가 여러 bloc을 가질 것이므로, 먼저 blocs.dart이라는 배럴 파일(barrel file)을 blocs폴더 안에 만들어 보겠습니다.
Bloc으로 뛰어 들기 전에 우리는 WeatherBloc가 어떤 이벤트를 WeatherState로 표현할 것인지 정의 할 필요가 있습니다. 우리의 파일을 작게 유지하기 위해 event, state및 bloc 3 개의 파일로 분리 할 것입니다.
WeatherEvent
blocs 폴더 안에 weather_event.dart라는 파일을 만듭니다. 간단히 하기 위해, 우리는 FetchWeather라고 불리는 하나의 이벤트를 가지고 시작할 것입니다.
다음과 같이 정의 할 수 있습니다.
import 'package:meta/meta.dart';
import 'package:equatable/equatable.dart';

abstract class WeatherEvent extends Equatable {
  WeatherEvent([List props = const []]) : super(props);
}

class FetchWeather extends WeatherEvent {
  final String city;

  FetchWeather({@required this.city})
      : assert(city != null),
        super([city]);
}
사용자가 도시를 입력 할 때마다 주어진 도시에서 FetchWeather 이벤트를 dispatch 할 것이고, 우리의 Bloc은 날씨에 대해 조회하여 새로운 WeatherState를 반환 할 책임이 있습니다.
그럼 배럴 파일에 클래스를 내보내겠습니다. blocs.dart 내부에 다음을 추가하세요.
export 'weather_event.dart';
WeatherState
다음으로 state 파일을 만듭니다. blocs 폴더 안에 weatherState.dart라는 파일을 생성합니다. 여기서weatherState 파일이 생깁니다.
현재 애플리케이션에는 4가지 상태가 있습니다.
WeatherEmpty- 사용자가 아직 도시를 선택하지 않았기 때문에 날씨 데이터가 없는 초기 상태WeatherLoading- 주어진 도시의 날씨를 가져 오는 동안 발생 할 상태WeatherLoaded- 특정 도시의 날씨를 성공적으로 가져올 수 있을 때 발생하는 상태WeatherError- 주어진 도시에서 날씨를 가져올 수없는 경우에 발생할 상태
우리는 다음과 같은 상태를 나타낼 수 있습니다:
import 'package:meta/meta.dart';
import 'package:equatable/equatable.dart';

import 'package:flutter_weather/models/models.dart';

abstract class WeatherState extends Equatable {
  WeatherState([List props = const []]) : super(props);
}

class WeatherEmpty extends WeatherState {}

class WeatherLoading extends WeatherState {}

class WeatherLoaded extends WeatherState {
  final Weather weather;

  WeatherLoaded({@required this.weather})
      : assert(weather != null),
        super([weather]);
}

class WeatherError extends WeatherState {}
그런 다음 이 클래스를 배럴 파일로 내 보냅니다. blocs.dart의 내부에서 다음을 추가하세요:
export 'weather_state.dart';
Events와 States를 정의하고 구현 했으므로 WeatherBloc을 만들 준비가 되었습니다.
WeatherBloc
우리의
WeatherBloc은 매우 간단합니다. 다시 말해,WeatherEvents를WeatherStates로 변환하고WeatherRepository에 의존합니다.
Tip: bloc 조각의 좋은 점을 취하고 효율성과 개발 속도를 더욱 향상 시키려면 Bloc VSCode Extension을 확인 하세요.
weather_bloc.dart라는 이름의 blocs 폴더 안에 파일을 만들고 다음을 추가 하세요:
import 'package:meta/meta.dart';
import 'package:bloc/bloc.dart';

import 'package:flutter_weather/repositories/repositories.dart';
import 'package:flutter_weather/models/models.dart';
import 'package:flutter_weather/blocs/blocs.dart';

class WeatherBloc extends Bloc<WeatherEvent, WeatherState> {
  final WeatherRepository weatherRepository;

  WeatherBloc({@required this.weatherRepository})
      : assert(weatherRepository != null);

  @override
  WeatherState get initialState => WeatherEmpty();

  @override
  Stream<WeatherState> mapEventToState(WeatherEvent event) async* {
    if (event is FetchWeather) {
      yield WeatherLoading();
      try {
        final Weather weather = await weatherRepository.getWeather(event.city);
        yield WeatherLoaded(weather: weather);
      } catch (_) {
        yield WeatherError();
      }
    }
  }
}
처음에는 사용자가 도시를 선택하지 않았기 때문에 우리의 initialState를 WeatherEmpty로 설정했습니다. 그러면 남은 것은 mapEventToState를 구현하는 것입니다.
FetchWeather 이벤트만 처리하기 때문에 FetchWeather 이벤트를 얻고 WeatherRepository에서 날씨를 얻으려고 할 때 WeatherLoading 상태를 yield해야합니다.
우리가 성공적으로 날씨를 검색 할 수 있다면 우리는 WeatherLoaded 상태를 yield하고 날씨를 검색 할 수 없다면 WeatherError 상태를yield 합니다.
이제 이 클래스를 blocs.dart에서 export 하세요 :
export 'weather_bloc.dart';
그게 전부입니다! 이제 최종 레이어인 프레젠테이션 레이어로 이동할 준비가되었습니다.
프리젠테이션 (Presentation)
준비 (Setup)
다른 튜토리얼에서 이미 보았 듯이, 애플리케이션에서 모든 상태 전이를 볼 수 있도록 SimpleBlocDelegate를 생성 할 것입니다. main() 함수 위에 있는 ` main.dart 파일에 이것을 추가해 보겠습니다. 그런 다음 main` 아래의 모든 코드를 삭제 하세요.
import 'package:bloc/bloc.dart';

class SimpleBlocDelegate extends BlocDelegate {
  @override
  onTransition(Bloc bloc, Transition transition) {
    super.onTransition(bloc, transition);
    print(transition);
  }
}
다음으로 우리는 main 함수에서 델리게이트를 다음과 같이 설정합니다 :
void main() {
  BlocSupervisor().delegate = SimpleBlocDelegate();
  runApp(App());
}
마지막으로, 우리는 우리의 WeatherRepository를 생성하고 App 위젯에 삽입해야합니다 (우리는 다음 단계에서 생성 할 것입니다).
import 'package:flutter_weather/repositories/repositories.dart';
import 'package:http/http.dart' as http;

void main() {
  BlocSupervisor().delegate = SimpleBlocDelegate();

  final WeatherRepository weatherRepository = WeatherRepository(
    weatherApiClient: WeatherApiClient(
      httpClient: http.Client(),
    ),
  );

  runApp(App(weatherRepository: weatherRepository));
}
App 위젯 (App Widget)
우리의 App위젯은 WeatherRepository가 삽입된 StatelessWidget으로 시작하고 (다음 단계에서 만들) Weather 위젯으로 MaterialApp을 빌드 할 것입니다.
class App extends StatelessWidget {
  final WeatherRepository weatherRepository;

  App({Key key, @required this.weatherRepository})
      : assert(weatherRepository != null),
        super(key: key);

  @override
  Widget build(BuildContext context) {
    return MaterialApp(
      title: 'Flutter Weather',
      home: Weather(
        weatherRepository: weatherRepository,
      ),
    );
  }
}
Weather
이제 Weather 위젯을 만들어야 합니다. lib 안에 widgets라는 폴더를 만들고 widgets.dart라는 내부에 배럴 파일을 만듭니다. 그리고 weather.dart라는 파일을 만듭니다.
우리의 Weather 위젯은 WeatherBloc을 생성하고 처리하는 StatefulWidget이 될 것입니다.
Stateful 위젯을 만들자 (Creating Out Stateful Widget)
import 'package:flutter/material.dart';
import 'package:flutter_bloc/flutter_bloc.dart';
import 'package:flutter_weather/widgets/widgets.dart';
import 'package:flutter_weather/repositories/repositories.dart';
import 'package:flutter_weather/blocs/blocs.dart';
class Weather extends StatefulWidget {
final WeatherRepository weatherRepository;
Weather({Key key, @required this.weatherRepository})
: assert(weatherRepository != null),
super(key: key);
@override
State<Weather> createState() => _WeatherState();
}
class _WeatherState extends State<Weather> {
WeatherBloc _weatherBloc;
@override
void initState() {
super.initState();
_weatherBloc = WeatherBloc(weatherRepository: widget.weatherRepository);
}
@override
Widget build(BuildContext context) {
return Scaffold(
appBar: AppBar(
title: Text('Flutter Weather'),
actions: <Widget>[
IconButton(
icon: Icon(Icons.search),
onPressed: () async {
final city = await Navigator.push(
context,
MaterialPageRoute(
builder: (context) => CitySelection(),
),
);
if (city != null) {
_weatherBloc.dispatch(FetchWeather(city: city));
}
},
)
],
),
body: Center(
child: BlocBuilder(
bloc: _weatherBloc,
builder: (_, WeatherState state) {
if (state is WeatherEmpty) {
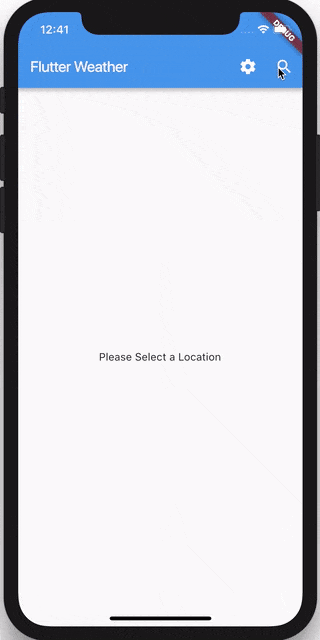
return Center(child: Text('Please Select a Location'));
}
if (state is WeatherLoading) {
return Center(child: CircularProgressIndicator());
}
if (state is WeatherLoaded) {
final weather = state.weather;
return ListView(
children: <Widget>[
Padding(
padding: EdgeInsets.only(top: 100.0),
child: Center(
child: Location(location: weather.location),
),
),
Center(
child: LastUpdated(dateTime: weather.lastUpdated),
),
Padding(
padding: EdgeInsets.symmetric(vertical: 50.0),
child: Center(
child: CombinedWeatherTemperature(
weather: weather,
),
),
),
],
);
}
if (state is WeatherError) {
return Text(
'Something went wrong!',
style: TextStyle(color: Colors.red),
);
}
},
),
),
);
}
@override
void dispose() {
_weatherBloc.dispose();
super.dispose();
}
}
이 위젯에서 일어나는 모든 일은 WeatherBloc에서 상태 변경을 기반으로 UI를 재구성하기 위해WeatherBloc과 함께BlocBuilder를 사용하고 있습니다.
widgets.dart 파일에서 Weather를 내 보냅니다.
다음 절에서 작성할 CitySelection, Location, LastUpdated 및 CombinedWeatherTemperature 위젯을 참조하고 있음을 알 수 있습니다.
Location 위쳇 (Location Widget)
widgets 폴더 안에 location.dart라는 파일을 만듭니다.
우리의
Location위젯은 간단합니다; 현재 위치를 표시합니다.
import 'package:flutter/material.dart';

class Location extends StatelessWidget {
  final String location;

  Location({Key key, @required this.location})
      : assert(location != null),
        super(key: key);

  @override
  Widget build(BuildContext context) {
    return Text(
      location,
      style: TextStyle(
        fontSize: 30,
        fontWeight: FontWeight.bold,
        color: Colors.white,
      ),
    );
  }
}
이것을 widgets.dart 파일에서 export 합니다.
LastUpdated
다음으로 widget 폴더 안에 last_updated.dart 파일을 만듭니다.
우리의 LastUpdated 위젯은 또한 매우 간단합니다; 사용자가 기상 데이터가 얼마나 신선한지를 알 수 있도록 마지막 업데이트 시간을 표시합니다.
import 'package:flutter/material.dart';

class LastUpdated extends StatelessWidget {
  final DateTime dateTime;

  LastUpdated({Key key, @required this.dateTime})
      : assert(dateTime != null),
        super(key: key);

  @override
  Widget build(BuildContext context) {
    return Text(
      'Updated: ${TimeOfDay.fromDateTime(dateTime).format(context)}',
      style: TextStyle(
        fontSize: 18,
        fontWeight: FontWeight.w200,
        color: Colors.white,
      ),
    );
  }
}
이것을 widgets.dart 파일에서 export 해야 합니다.
Note: 우리는 TimeOfDay를 사용하여DateTime을 보다 인간이 읽을 수 있는 형식(human-readable format)으로 포맷합니다.
CombinedWeatherTemplate
다음으로 widgets 폴더 안에 combined_weather_temperature.dart 파일을 만듭니다.
CombinedWeatherTemperature위젯은 온도와 함께 현재 날씨를 표시하는 compositional 위젯입니다. 우리는 여전히Temperature와WeatherConditions위젯을 모듈화하여 모두 재사용 할 수 있도록 할 것입니다.
import 'package:flutter/material.dart';

import 'package:flutter_weather/models/models.dart' as model;
import 'package:flutter_weather/widgets/widgets.dart';

class CombinedWeatherTemperature extends StatelessWidget {
  final model.Weather weather;

  CombinedWeatherTemperature({
    Key key,
    @required this.weather,
  })  : assert(weather != null),
        super(key: key);

  @override
  Widget build(BuildContext context) {
    return Column(
      children: [
        Row(
          mainAxisAlignment: MainAxisAlignment.center,
          children: <Widget>[
            Padding(
              padding: EdgeInsets.all(20.0),
              child: WeatherConditions(condition: weather.condition),
            ),
            Padding(
              padding: EdgeInsets.all(20.0),
              child: Temperature(
                temperature: weather.temp,
                high: weather.maxTemp,
                low: weather.minTemp,
              ),
            ),
          ],
        ),
        Center(
          child: Text(
            weather.formattedCondition,
            style: TextStyle(
              fontSize: 30,
              fontWeight: FontWeight.w200,
              color: Colors.white,
            ),
          ),
        ),
      ],
    );
  }
}
이 파일을 widgets.dart 파일로 내 보내야 합니다.
Note: 우리는 두 가지 구현되지 않은 위젯인 WeatherConditions와 Temperature를 사용합니다.
WeatherConditions
다음으로widgets 폴더 안에 weather_conditions.dart 파일을 만듭니다.
우리의
WeatherConditions위젯은 일치하는 아이콘과 함께 현재의 날씨 상태 (맑음, 소나기, 뇌우 등)를 표시 할 책임이 있습니다.
import 'package:flutter/material.dart';

import 'package:flutter_weather/models/models.dart';

class WeatherConditions extends StatelessWidget {
  final WeatherCondition condition;

  WeatherConditions({Key key, @required this.condition})
      : assert(condition != null),
        super(key: key);

  @override
  Widget build(BuildContext context) => _mapConditionToImage(condition);

  Image _mapConditionToImage(WeatherCondition condition) {
    Image image;
    switch (condition) {
      case WeatherCondition.clear:
      case WeatherCondition.lightCloud:
        image = Image.asset('assets/clear.png');
        break;
      case WeatherCondition.hail:
      case WeatherCondition.snow:
      case WeatherCondition.sleet:
        image = Image.asset('assets/snow.png');
        break;
      case WeatherCondition.heavyCloud:
        image = Image.asset('assets/cloudy.png');
        break;
      case WeatherCondition.heavyRain:
      case WeatherCondition.lightRain:
      case WeatherCondition.showers:
        image = Image.asset('assets/rainy.png');
        break;
      case WeatherCondition.thunderstorm:
        image = Image.asset('assets/thunderstorm.png');
        break;
      case WeatherCondition.unknown:
        image = Image.asset('assets/clear.png');
        break;
    }
    return image;
  }
}
여기서 우리는 일부 애셋을 사용하고 있음을 알 수 있습니다. 여기에서 다운로드하여 프로젝트 초기에 생성 한assets/디렉토리에 추가하세요.
이 파일을 widgets.dart 파일로 내 보내야합니다.
Tip: 이 자습서에서 사용 된 자산의 경우 icons8을 확인하세요.
Temperature
다음은 widgets 폴더 안에 temperature.dart 파일을 만듭니다.
우리의
Temperature위젯은 평균, 최소, 최대 온도를 표시 할 책임이 있습니다.
import 'package:flutter/material.dart';

class Temperature extends StatelessWidget {
  final double temperature;
  final double low;
  final double high;

  Temperature({
    Key key,
    this.temperature,
    this.low,
    this.high,
  }) : super(key: key);

  @override
  Widget build(BuildContext context) {
    return Row(
      children: [
        Padding(
          padding: EdgeInsets.only(right: 20.0),
          child: Text(
            '${_formattedTemperature(temperature)}°',
            style: TextStyle(
              fontSize: 32,
              fontWeight: FontWeight.w600,
              color: Colors.white,
            ),
          ),
        ),
        Column(
          children: [
            Text(
              'max: ${_formattedTemperature(high)}°',
              style: TextStyle(
                fontSize: 16,
                fontWeight: FontWeight.w100,
                color: Colors.white,
              ),
            ),
            Text(
              'min: ${_formattedTemperature(low)}°',
              style: TextStyle(
                fontSize: 16,
                fontWeight: FontWeight.w100,
                color: Colors.white,
              ),
            )
          ],
        )
      ],
    );
  }

  int _formattedTemperature(double t) => t.round();
}
이 것을 widgets.dart 파일에서 export 해야 합니다.
CitySelection
functional 앱을 구현하기 위해 구현해야 할 마지막 일은 사용자가 도시 이름을 입력 할 수 있게 해주는CitySelection 위젯입니다. widgets 폴더 안에 city_selection.dart 파일을 생성합니다.
CitySelection위젯은 사용자가 도시 이름을 입력하고 선택된 도시를App위젯으로 되돌려 줄 수 있습니다.
import 'package:flutter/material.dart';

class CitySelection extends StatefulWidget {
  @override
  State<CitySelection> createState() => _CitySelectionState();
}

class _CitySelectionState extends State<CitySelection> {
  final TextEditingController _textController = TextEditingController();

  @override
  Widget build(BuildContext context) {
    return Scaffold(
      appBar: AppBar(
        title: Text('City'),
      ),
      body: Form(
        child: Row(
          children: [
            Expanded(
              child: Padding(
                padding: EdgeInsets.only(left: 10.0),
                child: TextFormField(
                  controller: _textController,
                  decoration: InputDecoration(
                    labelText: 'City',
                    hintText: 'Chicago',
                  ),
                ),
              ),
            ),
            IconButton(
              icon: Icon(Icons.search),
              onPressed: () {
                Navigator.pop(context, _textController.text);
              },
            )
          ],
        ),
      ),
    );
  }
}
TextController를 유지해야하기 때문에 StatefulWidget이어야 합니다.
Note: 검색 버튼을 누르면 Navigator.pop을 사용하고 TextController의 현재 텍스트를 이전 보기로 되돌립니다.
이것을 widgets.dart 파일에서 export를 하세요.
App을 실행하기 (Run the App)
이제 모든 위젯을 만들었으므로 main.dart 파일로 돌아가겠습니다. Weather 위젯을 가져 와야 한다는 것을 알게 될 것입니다. 그래서 이 라인을 위에 추가하세요.
import 'package:flutter_weather/widgets/widgets.dart';
그런 다음 터미널에서 flutter run를 실행하여 앱을 실행할 수 있습니다. 도시를 선택하면 몇 가지 문제가 있음을 알 수 있습니다.
- 배경이 흰색이므로 읽을 수 없는 텍스트도 있습니다.
- 날씨 데이터를 가져온 후에 새로 고칠 방법이 없습니다.
- UI가 매우 단순합니다.
- 모든 것이 섭씨입니다. 우리는 단위를 바꿀 방법이 없습니다.
이 문제를 해결하고 Weather App을 다음 단계로 가져 가겠습니다.
Pull-To-Refresh
pull-to-refresh를 지원하기 위해서는
WeatherEvent를 업데이트하여 두 번째 이벤트RefreshWeather를 처리해야 합니다. 다음 코드를blocs/weather_event.dart에 추가하십시오.
class RefreshWeather extends WeatherEvent {
  final String city;

  RefreshWeather({@required this.city})
      : assert(city != null),
        super([city]);
}
다음으로 weather_bloc.dart 내부의 mapEventToState를 업데이트하여 RefreshWeather 이벤트를 처리해야 합니다. 이 if 문을 기존 문 아래에 추가 하세요.
if (event is RefreshWeather) {
  try {
    final Weather weather = await weatherRepository.getWeather(event.city);
    yield WeatherLoaded(weather: weather);
  } catch (_) {
    yield currentState;
  }
}
여기서는 weatherRepository에 도시 날씨를 얻기을 위한 API 호출을 요청할 새 이벤트를 작성하는 중입니다.
마지막으로, 우리는 RefreshIndicator 위젯을 사용하기 위해 프리젠테이션 레이어를 업데이트 해야합니다. widgets/weather.dart에서 Weather 위젯을 수정 하겠습니다. 우리가 해야 할 일이 몇 가지 있습니다.
Futre를 다루기 위해weather.dart파일에async를import하세요.
import 'dart:async';
Completer의 개체를 추가하세요.
class _WeatherState extends State<Weather> {
  WeatherBloc _weatherBloc;
  Completer<void> _refreshCompleter;

  @override
  void initState() {
    super.initState();
    _refreshCompleter = Completer<void>();
    _weatherBloc = WeatherBloc(weatherRepository: widget.weatherRepository);
  }
  ...
- 위젯의
build메소드 안에서RefreshIndicator위젯안에ListView를 래핑하세요. 그런 다음onRefresh콜백이 발생하면_refreshCompleter.future를 반환합니다.
return RefreshIndicator(
  onRefresh: () {
    _weatherBloc.dispatch(
      RefreshWeather(city: state.weather.location),
    );
    return _refreshCompleter.future;
  },
  child: ListView(
    children: <Widget>[
      Padding(
        padding: EdgeInsets.only(top: 100.0),
        child: Center(
          child: Location(location: weather.location),
        ),
      ),
      Center(
        child: LastUpdated(dateTime: weather.lastUpdated),
      ),
      Padding(
        padding: EdgeInsets.symmetric(vertical: 50.0),
        child: Center(
          child: CombinedWeatherTemperature(
            weather: weather,
          ),
        ),
      ),
    ],
  ),
);
RefreshIndicator를 사용하기 위해서, 우리는 Completer를 생성해야 했습니다. 그것은 우리는 나중에 완료 할 수 있있도록 Future를 produce의 할 수 있도록 했습니다.
이게 전부입니다. 이제 문제 #1을 해결했으며 사용자는 날씨를 새로 고침 할 수 있습니다. flutter run을 다시 실행하고 날씨를 새로 리프레시하세요.
다음으로 ThemeBloc을 작성하여 일반적인 UI를 다루어 보겠습니다.
동적 테마 (Dynamic Theming)
ThemeBloc은 ThemeEvents를 ThemeStates로 변환 할 책임이 있습니다.
우리의 ThemeEvents는 WeatherChanged라는 단일 이벤트로 구성되어 표시되는 기상 조건이 변경 될 때마다 전달됩니다.
abstract class ThemeEvent extends Equatable {
  ThemeEvent([List props = const []]) : super(props);
}

class WeatherChanged extends ThemeEvent {
  final WeatherCondition condition;

  WeatherChanged({@required this.condition})
      : assert(condition != null),
        super([condition]);
}
ThemeState는 UI를 향상시키는데 사용하는 ThemeData와 MaterialColor로 구성 됩니다.
class ThemeState extends Equatable {
  final ThemeData theme;
  final MaterialColor color;

  ThemeState({@required this.theme, @required this.color})
      : assert(theme != null),
        assert(color != null),
        super([theme, color]);
}
이제 우리는 다음과 같은 ThemeBloc을 구현할 수 있습니다:
class ThemeBloc extends Bloc<ThemeEvent, ThemeState> {
  @override
  ThemeState get initialState => ThemeState(
        theme: ThemeData.light(),
        color: Colors.lightBlue,
      );

  @override
  Stream<ThemeState> mapEventToState(ThemeEvent event) async* {
    if (event is WeatherChanged) {
      yield _mapWeatherConditionToThemeData(event.condition);
    }
  }

  ThemeState _mapWeatherConditionToThemeData(WeatherCondition condition) {
    ThemeState theme;
    switch (condition) {
      case WeatherCondition.clear:
      case WeatherCondition.lightCloud:
        theme = ThemeState(
          theme: ThemeData(
            primaryColor: Colors.orangeAccent,
          ),
          color: Colors.yellow,
        );
        break;
      case WeatherCondition.hail:
      case WeatherCondition.snow:
      case WeatherCondition.sleet:
        theme = ThemeState(
          theme: ThemeData(
            primaryColor: Colors.lightBlueAccent,
          ),
          color: Colors.lightBlue,
        );
        break;
      case WeatherCondition.heavyCloud:
        theme = ThemeState(
          theme: ThemeData(
            primaryColor: Colors.blueGrey,
          ),
          color: Colors.grey,
        );
        break;
      case WeatherCondition.heavyRain:
      case WeatherCondition.lightRain:
      case WeatherCondition.showers:
        theme = ThemeState(
          theme: ThemeData(
            primaryColor: Colors.indigoAccent,
          ),
          color: Colors.indigo,
        );
        break;
      case WeatherCondition.thunderstorm:
        theme = ThemeState(
          theme: ThemeData(
            primaryColor: Colors.deepPurpleAccent,
          ),
          color: Colors.deepPurple,
        );
        break;
      case WeatherCondition.unknown:
        theme = ThemeState(
          theme: ThemeData.light(),
          color: Colors.lightBlue,
        );
        break;
    }
    return theme;
  }
}
코드가 많더라도 여기서 유일한 것은 WeatherCondition을 새로운 ThemeState로 변환하는 로직입니다.
이제 우리는 App 위젯을 업데이트 하여 ThemeBloc을 생성하고 ThemeState의 변화에 반응하는BlocBuilder를 사용할 수 있습니다.
이제 우리의 App 위젯 은ThemeBloc을 생성하고 폐기 할 책임이 있습니다. 우리는 이것을 StatefulWidget으로 리팩토링 해야 합니다.
class App extends StatefulWidget {
  final WeatherRepository weatherRepository;

  App({Key key, @required this.weatherRepository})
      : assert(weatherRepository != null),
        super(key: key);

  @override
  State<App> createState() => _AppState();
}

class _AppState extends State<App> {
  ThemeBloc _themeBloc = ThemeBloc();

  @override
  Widget build(BuildContext context) {
    return BlocProvider(
      bloc: _themeBloc,
      child: BlocBuilder(
        bloc: _themeBloc,
        builder: (_, ThemeState themeState) {
          return MaterialApp(
            title: 'Flutter Weather',
            theme: themeState.theme,
            home: Weather(
              weatherRepository: widget.weatherRepository,
            ),
          );
        },
      ),
    );
  }

  @override
  void dispose() {
    _themeBloc.dispose();
    super.dispose();
  }
}
Note: 우리는 BlocProvider를 사용하여 ThemeBloc을 BlocProvider.of<ThemeBloc>(context)를 사용하여 전역적으로 사용할 수 있게 했습니다.
마지막으로 우리가 해야 할 일은 현재의 기상 상황에 대한 우리의 배경을 채색 할 멋진 GradientContainer 위젯을 만드는 것입니다.
import 'package:flutter/material.dart';

import 'package:meta/meta.dart';

class GradientContainer extends StatelessWidget {
  final Widget child;
  final MaterialColor color;

  const GradientContainer({
    Key key,
    @required this.color,
    @required this.child,
  })  : assert(color != null, child != null),
        super(key: key);

  @override
  Widget build(BuildContext context) {
    return Container(
      decoration: BoxDecoration(
        gradient: LinearGradient(
          begin: Alignment.topCenter,
          end: Alignment.bottomCenter,
          stops: [0.6, 0.8, 1.0],
          colors: [
            color[700],
            color[500],
            color[300],
          ],
        ),
      ),
      child: child,
    );
  }
}
이제 Weather 위젯에서 GradientContainer를 다음과 같이 사용할 수 있습니다:
import 'dart:async';

import 'package:flutter/material.dart';

import 'package:flutter_bloc/flutter_bloc.dart';

import 'package:flutter_weather/widgets/widgets.dart';
import 'package:flutter_weather/repositories/repositories.dart';
import 'package:flutter_weather/blocs/blocs.dart';

class Weather extends StatefulWidget {
  final WeatherRepository weatherRepository;

  Weather({Key key, @required this.weatherRepository})
      : assert(weatherRepository != null),
        super(key: key);

  @override
  State<Weather> createState() => _WeatherState();
}

class _WeatherState extends State<Weather> {
  WeatherBloc _weatherBloc;
  Completer<void> _refreshCompleter;

  @override
  void initState() {
    super.initState();
    _refreshCompleter = Completer<void>();
    _weatherBloc = WeatherBloc(weatherRepository: widget.weatherRepository);
  }

  @override
  Widget build(BuildContext context) {
    return Scaffold(
      appBar: AppBar(
        title: Text('Flutter Weather'),
        actions: <Widget>[
          IconButton(
            icon: Icon(Icons.search),
            onPressed: () async {
              final city = await Navigator.push(
                context,
                MaterialPageRoute(
                  builder: (context) => CitySelection(),
                ),
              );
              if (city != null) {
                _weatherBloc.dispatch(FetchWeather(city: city));
              }
            },
          )
        ],
      ),
      body: Center(
        child: BlocListener(
          bloc: _weatherBloc,
          listener: (BuildContext context, WeatherState state) {
            if (state is WeatherLoaded) {
              BlocProvider.of<ThemeBloc>(context).dispatch(
                WeatherChanged(condition: state.weather.condition),
              );
              _refreshCompleter?.complete();
              _refreshCompleter = Completer();
            }
          },
          child: BlocBuilder(
            bloc: _weatherBloc,
            builder: (_, WeatherState state) {
              if (state is WeatherEmpty) {
                return Center(child: Text('Please Select a Location'));
              }
              if (state is WeatherLoading) {
                return Center(child: CircularProgressIndicator());
              }
              if (state is WeatherLoaded) {
                final weather = state.weather;

                return BlocBuilder(
                  bloc: BlocProvider.of<ThemeBloc>(context),
                  builder: (_, ThemeState themeState) {
                    return GradientContainer(
                      color: themeState.color,
                      child: RefreshIndicator(
                        onRefresh: () {
                          _weatherBloc.dispatch(
                            RefreshWeather(city: weather.location),
                          );
                          return _refreshCompleter.future;
                        },
                        child: ListView(
                          children: <Widget>[
                            Padding(
                              padding: EdgeInsets.only(top: 100.0),
                              child: Center(
                                child: Location(location: weather.location),
                              ),
                            ),
                            Center(
                              child: LastUpdated(dateTime: weather.lastUpdated),
                            ),
                            Padding(
                              padding: EdgeInsets.symmetric(vertical: 50.0),
                              child: Center(
                                child: CombinedWeatherTemperature(
                                  weather: weather,
                                ),
                              ),
                            ),
                          ],
                        ),
                      ),
                    );
                  },
                );
              }
              if (state is WeatherError) {
                return Text(
                  'Something went wrong!',
                  style: TextStyle(color: Colors.red),
                );
              }
            },
          ),
        ),
      ),
    );
  }

  @override
  void dispose() {
    _weatherBloc.dispose();
    super.dispose();
  }
}
우리는 WeatherBloc의 상태 변화에 대한 응답으로 무언가를 하고 싶기 때문에 BlocListener를 사용하고 있습니다. 이 경우 우리는 Completer를 완료하고 재설정하고 ThemeBloc에 WeatherChanged 이벤트를 보냅니다.
Tip: BlocListener 위젯에 대한 더 많은 정보는 BlocListener Recipe에서 확인 할 수 있습니다.
우리는 ThemeBloc을 BlocProvider.of<ThemeBloc>(context)를 통해 접근하고 각 WeatherLoad에WeatherChanged 이벤트를 보냅니다.
우리는 GradientContainer 위젯을 ThemeBloc의 BlocBuilder으로 감싸서 GradientContainer를 다시 만들었고 ThemeState에 대한 응답으로 children들을 변경했습니다.
이제 우리는 더 멋지게 보이는 앱을 가지고 있습니다. 문제 #2를 해결했습니다.
남은 것은 단위 변환을 섭씨와 화씨 사이에서 처리하는 것입니다. 이를 위해 우리는 Settings 위젯과SettingsBloc을 만들 것입니다.
단위 변환 (Unit Conversion)
우리는 SettingsBloc을 만들어서 SettingsEvents를 SettingsStates로 변환하는 것으로 시작하겠습니다.
우리의 SettingsEvents는 TemperatureUnitsToggled라는 단일 이벤트로 구성됩니다.
abstract class SettingsEvent extends Equatable {}

class TemperatureUnitsToggled extends SettingsEvent {}
우리의 SettingsState는 단순히 현재의 TemperatureUnits로 구성됩니다.
enum TemperatureUnits { fahrenheit, celsius }

class SettingsState extends Equatable {
  final TemperatureUnits temperatureUnits;

  SettingsState({@required this.temperatureUnits})
      : assert(temperatureUnits != null),
        super([temperatureUnits]);
}
마지막으로SettingsBlocks을 만들어야 합니다.
class SettingsBloc extends Bloc<SettingsEvent, SettingsState> {
  @override
  SettingsState get initialState =>
      SettingsState(temperatureUnits: TemperatureUnits.celsius);

  @override
  Stream<SettingsState> mapEventToState(SettingsEvent event) async* {
    if (event is TemperatureUnitsToggled) {
      yield SettingsState(
        temperatureUnits:
            currentState.temperatureUnits == TemperatureUnits.celsius
                ? TemperatureUnits.fahrenheit
                : TemperatureUnits.celsius,
      );
    }
  }
}
우리가 하고있는 일은 TemperatureUnitsToggled가 전달되고 현재 단위가 celsius이고 그 반대의 경우fahrenheite를 사용하는 것입니다.
이제 우리의 App 위젯에 SettingsBloc을 추가해야 합니다.
class App extends StatefulWidget {
  final WeatherRepository weatherRepository;

  App({Key key, @required this.weatherRepository})
      : assert(weatherRepository != null),
        super(key: key);

  @override
  State<App> createState() => _AppState();
}

class _AppState extends State<App> {
  ThemeBloc _themeBloc = ThemeBloc();
  SettingsBloc _settingsBloc = SettingsBloc();

  @override
  Widget build(BuildContext context) {
    return BlocProviderTree(
      blocProviders: [
        BlocProvider<ThemeBloc>(bloc: _themeBloc),
        BlocProvider<SettingsBloc>(bloc: _settingsBloc),
      ],
      child: BlocBuilder(
        bloc: _themeBloc,
        builder: (_, ThemeState themeState) {
          return MaterialApp(
            title: 'Flutter Weather',
            theme: themeState.theme,
            home: Weather(
              weatherRepository: widget.weatherRepository,
            ),
          );
        },
      ),
    );
  }

  @override
  void dispose() {
    _themeBloc.dispose();
    _settingsBloc.dispose();
    super.dispose();
  }
}
다시 말하자면, 우리는 SettingsBloc을 BlocProvider를 사용하여 전역적으로 액세스 가능하게 만들고 있습니다. 그리고 지금 우리는 dispose 재정의에 그것을 폐기하고 있습니다. 그러나 이번에는 같은 레벨에서BlocProvider를 사용하여 하나 이상의 Bloc을 노출시키고 있으므로 BlocProviderTree 위젯을 사용하여 일부 중첩을 제거 할 수 있습니다.
이제 사용자가 단위를 토글 할 수 있는 Settings 위젯을 만들어야합니다.
import 'package:flutter/material.dart';

import 'package:flutter_bloc/flutter_bloc.dart';

import 'package:flutter_weather/blocs/blocs.dart';

class Settings extends StatelessWidget {
  @override
  Widget build(BuildContext context) {
    final settingsBloc = BlocProvider.of<SettingsBloc>(context);
    return Scaffold(
      appBar: AppBar(title: Text('Settings')),
      body: ListView(
        children: <Widget>[
          BlocBuilder(
              bloc: settingsBloc,
              builder: (_, SettingsState state) {
                return ListTile(
                  title: Text(
                    'Temperature Units',
                  ),
                  isThreeLine: true,
                  subtitle:
                      Text('Use metric measurements for temperature units.'),
                  trailing: Switch(
                    value: state.temperatureUnits == TemperatureUnits.celsius,
                    onChanged: (_) =>
                        settingsBloc.dispatch(TemperatureUnitsToggled()),
                  ),
                );
              }),
        ],
      ),
    );
  }
}
우리는 BuildContext를 통해 SettingsBloc에 접근하기 위해 BlocProvider를 사용하고SettingsState가 변경된 것을 기반으로 UI를 재빌드하기 위해 BlocBuilder를 사용하고 있습니다.
UI는 사용자가 celsius와 e를 선택할 수있는 Switch를 포함하는 단일 ListTile이 있는 ListView로 구성됩니다.
Note: Switch의 onChanged 메소드에서 TemperatureUnitsToggled 이벤트를 보내 SettingsBloc에 온도 단위가 변경되었음을 알립니다.
다음으로, 사용자가 우리의 Weather 위젯에서 Settings 위젯에 접근 할 수 있게 해야 합니다.
우리는 AppBar에 새로운 IconButton을 추가함으로써 그렇게 할 수 있습니다.
import 'dart:async';

import 'package:flutter/material.dart';

import 'package:flutter_bloc/flutter_bloc.dart';

import 'package:flutter_weather/widgets/widgets.dart';
import 'package:flutter_weather/repositories/repositories.dart';
import 'package:flutter_weather/blocs/blocs.dart';

class Weather extends StatefulWidget {
  final WeatherRepository weatherRepository;

  Weather({Key key, @required this.weatherRepository})
      : assert(weatherRepository != null),
        super(key: key);

  @override
  State<Weather> createState() => _WeatherState();
}

class _WeatherState extends State<Weather> {
  WeatherBloc _weatherBloc;
  Completer<void> _refreshCompleter;

  @override
  void initState() {
    super.initState();
    _refreshCompleter = Completer<void>();
    _weatherBloc = WeatherBloc(weatherRepository: widget.weatherRepository);
  }

  @override
  Widget build(BuildContext context) {
    return Scaffold(
      appBar: AppBar(
        title: Text('Flutter Weather'),
        actions: <Widget>[
          IconButton(
            icon: Icon(Icons.settings),
            onPressed: () {
              Navigator.push(
                context,
                MaterialPageRoute(
                  builder: (context) => Settings(),
                ),
              );
            },
          ),
          IconButton(
            icon: Icon(Icons.search),
            onPressed: () async {
              final city = await Navigator.push(
                context,
                MaterialPageRoute(
                  builder: (context) => CitySelection(),
                ),
              );
              if (city != null) {
                _weatherBloc.dispatch(FetchWeather(city: city));
              }
            },
          )
        ],
      ),
      body: Center(
        child: BlocListener(
          bloc: _weatherBloc,
          listener: (BuildContext context, WeatherState state) {
            if (state is WeatherLoaded) {
              BlocProvider.of<ThemeBloc>(context).dispatch(
                WeatherChanged(condition: state.weather.condition),
              );
              _refreshCompleter?.complete();
              _refreshCompleter = Completer();
            }
          },
          child: BlocBuilder(
            bloc: _weatherBloc,
            builder: (_, WeatherState state) {
              if (state is WeatherEmpty) {
                return Center(child: Text('Please Select a Location'));
              }
              if (state is WeatherLoading) {
                return Center(child: CircularProgressIndicator());
              }
              if (state is WeatherLoaded) {
                final weather = state.weather;

                return BlocBuilder(
                  bloc: BlocProvider.of<ThemeBloc>(context),
                  builder: (_, ThemeState themeState) {
                    return GradientContainer(
                      color: themeState.color,
                      child: RefreshIndicator(
                        onRefresh: () {
                          _weatherBloc.dispatch(
                            RefreshWeather(city: weather.location),
                          );
                          return _refreshCompleter.future;
                        },
                        child: ListView(
                          children: <Widget>[
                            Padding(
                              padding: EdgeInsets.only(top: 100.0),
                              child: Center(
                                child: Location(location: weather.location),
                              ),
                            ),
                            Center(
                              child: LastUpdated(dateTime: weather.lastUpdated),
                            ),
                            Padding(
                              padding: EdgeInsets.symmetric(vertical: 50.0),
                              child: Center(
                                child: CombinedWeatherTemperature(
                                  weather: weather,
                                ),
                              ),
                            ),
                          ],
                        ),
                      ),
                    );
                  },
                );
              }
              if (state is WeatherError) {
                return Text(
                  'Something went wrong!',
                  style: TextStyle(color: Colors.red),
                );
              }
            },
          ),
        ),
      ),
    );
  }

  @override
  void dispose() {
    _weatherBloc.dispose();
    super.dispose();
  }
}
거의 끝나 갑니다! 현재 단위에 응답하기 위해 Temperature 위젯을 업데이트하면 됩니다.
import 'package:flutter/material.dart';

import 'package:flutter_weather/blocs/blocs.dart';

class Temperature extends StatelessWidget {
  final double temperature;
  final double low;
  final double high;
  final TemperatureUnits units;

  Temperature({
    Key key,
    this.temperature,
    this.low,
    this.high,
    this.units,
  }) : super(key: key);

  @override
  Widget build(BuildContext context) {
    return Row(
      children: [
        Padding(
          padding: EdgeInsets.only(right: 20.0),
          child: Text(
            '${_formattedTemperature(temperature)}°',
            style: TextStyle(
              fontSize: 32,
              fontWeight: FontWeight.w600,
              color: Colors.white,
            ),
          ),
        ),
        Column(
          children: [
            Text(
              'max: ${_formattedTemperature(high)}°',
              style: TextStyle(
                fontSize: 16,
                fontWeight: FontWeight.w100,
                color: Colors.white,
              ),
            ),
            Text(
              'min: ${_formattedTemperature(low)}°',
              style: TextStyle(
                fontSize: 16,
                fontWeight: FontWeight.w100,
                color: Colors.white,
              ),
            )
          ],
        )
      ],
    );
  }

  int _toFahrenheit(double celsius) => ((celsius * 9 / 5) + 32).round();

  int _formattedTemperature(double t) =>
      units == TemperatureUnits.fahrenheit ? _toFahrenheit(t) : t.round();
}
그리고 마지막으로 TemperatureUnits를 Temperature 위젯에 주입 할 필요가 있습니다.
import 'package:flutter/material.dart';

import 'package:meta/meta.dart';
import 'package:flutter_bloc/flutter_bloc.dart';

import 'package:flutter_weather/blocs/blocs.dart';
import 'package:flutter_weather/models/models.dart' as model;
import 'package:flutter_weather/widgets/widgets.dart';

class CombinedWeatherTemperature extends StatelessWidget {
  final model.Weather weather;

  CombinedWeatherTemperature({
    Key key,
    @required this.weather,
  })  : assert(weather != null),
        super(key: key);

  @override
  Widget build(BuildContext context) {
    return Column(
      children: [
        Row(
          mainAxisAlignment: MainAxisAlignment.center,
          children: <Widget>[
            Padding(
              padding: EdgeInsets.all(20.0),
              child: WeatherConditions(condition: weather.condition),
            ),
            Padding(
              padding: EdgeInsets.all(20.0),
              child: BlocBuilder(
                bloc: BlocProvider.of<SettingsBloc>(context),
                builder: (_, SettingsState state) {
                  return Temperature(
                    temperature: weather.temp,
                    high: weather.maxTemp,
                    low: weather.minTemp,
                    units: state.temperatureUnits,
                  );
                },
              ),
            ),
          ],
        ),
        Center(
          child: Text(
            weather.formattedCondition,
            style: TextStyle(
              fontSize: 30,
              fontWeight: FontWeight.w200,
              color: Colors.white,
            ),
          ),
        ),
      ],
    );
  }
}
그게 전부입니다! 우리는 이제 bloc 및 flutter_bloc을 사용하여 Flutter로 날씨 애플리케이션을 성공적으로 구현했습니다. 우리는 프레젠테이션 레이어와 비즈니스 로직을 성공적으로 분리했습니다.
전체 소스 코드는 이곳에 있습니다.
이전: 로그인 (Login)
다음: 할일 (Todos)