Bloc 2.0.0
A Flutter package that helps implement the BLoC pattern.
This package is built to work with bloc.
Bloc Widgets #
BlocBuilder는 Bloc과 builder 함수를 필요로하는 Flutter 위젯입니다. BlocBuilder는 새로운 상태에 대한 응답으로 위젯을 구현합니다. BlocBuilder는 StreamBuilder와 매우 비슷하지만 필요한 보일러 판 코드의 양을 줄이기위한 더 간단한 API를 가지고 있습니다. builder 함수는 잠재적으로 여러 번 호출 될 것이고 상태에 대한 응답으로 위젯을 리턴하는 pure function이어야 합니다.
탐색, 대화 상자 표시 등과 같은 상태 변경에 대한 응답으로 무엇이든 “수행”하려면 BlocListener를 참조하십시오.
bloc 매개 변수를 생략하면 BlocBuilder는 BlocProvider와 현재 BuildContext를 사용하여 자동으로 룩업을 수행합니다.
BlocBuilder<BlocA, BlocAState>(
  builder: (context, state) {
    // return widget here based on BlocA's state
  }
)
BlocProvider와 현재 BuildContext를 통해 접근 할 수 없는 Bloc을 제공하고자 할 때만 Bloc을 지정하십시오.
BlocBuilder<BlocA, BlocAState>(
  bloc: blocA,
  builder: (context, state) {
    // return widget here based on BlocA's state
  }
)
빌더 함수가 호출 될 때 세밀하게 제어하고 싶다면 condition을 BlocBuilder에 제공 할 수 있습니다. condition은 이전의 블록 상태와 현재의 블록 상태를 취해서 부울을 반환합니다. condition이 true를 반환하면 builder가 currentState와 함께 호출되고 위젯이 다시 빌드됩니다. condition이 false를 반환하면 builder는 currentState로 호출되지 않고 다시 빌드되지 않습니다.
BlocBuilder<BlocA, BlocAState>(
  condition: (previousState, currentState) {
    // return true/false to determine whether or not
    // to rebuild the widget with currentState
  },
  builder: (context, state) {
    // return widget here based on BlocA's state
  }
)
BlocProvider는 BlocProvider.of<T>(context)를 통해 그 Bloc을 제공하는 Flutter 위젯입니다. 종속성 삽입 (DI) 위젯으로 사용되어 Bloc의 단일 인스턴스가 서브 트리 내의 여러 위젯에 제공 될 수 있습니다.
대부분의 경우, BlocProvider는 나머지 서브 트리에서 사용할 새로운blocs을 만드는 데 사용해야 합니다. 이 경우, BlocProvider가 블록을 작성하는 책임이 있기 때문에, Bloc을 자동으로 처리합니다.
BlocProvider(
  builder: (BuildContext context) => BlocA(),
  child: ChildA(),
);
경우에 따라 BlocProvider를 사용하여 기존 Bloc을 위젯 트리의 새 부분에 제공 할 수 있습니다. 이것은 기존의 Bloc을 새로운 경로에 사용할 수 있어야 할 때 가장 일반적으로 사용됩니다. 이 경우 BlocProvider는 블록을 생성하지 않았기 때문에 블록을 자동으로 처리하지 않습니다.
BlocProvider.value(
  value: BlocProvider.of<BlocA>(context),
  child: ScreenA(),
);
ChildS 나 ScreenS에서 우리는 Bloc를 다음과 같이 검색 할 수 있습니다:
BlocProvider.of<BlocA>(context)
MultiBlocProvider 는 여러 개의 BlocProvider 위젯을 하나로 합친 Flutter 위젯입니다. MultiBlocProvider는 가독성을 높이고 여러 개의 BlocProviders를 중첩 할 필요가 없습니다. MultiBlocProvider를 사용함으로써 우리는 다음과 같이 할 수 있습니다 :
BlocProvider<BlocA>(
  builder: (BuildContext context) => BlocA(),
  child: BlocProvider<BlocB>(
    builder: (BuildContext context) => BlocB(),
    child: BlocProvider<BlocC>(
      builder: (BuildContext context) => BlocC(),
      child: ChildA(),
    )
  )
)
to:
MultiBlocProvider(
  providers: [
    BlocProvider<BlocA>(
      builder: (BuildContext context) => BlocA(),
    ),
    BlocProvider<BlocB>(
      builder: (BuildContext context) => BlocB(),
    ),
    BlocProvider<BlocC>(
      builder: (BuildContext context) => BlocC(),
    ),
  ],
  child: ChildA(),
)
BlocListener 는 BlocWidgetListener와 선택적인 Bloc을 취하고 블록의 상태 변화에 대한 응답으로 listener를 호출하는 Flutter 위젯입니다. 네비게이션, SnackBar 표시, Dialog 표시 등과 같은 상태 변경마다 한 번씩 발생해야하는 기능에 사용해야 합니다.
listener는 BlocBuilder에서 builder와는 달리 상태 변경마다 한 번만 호출되며 void 함수입니다. (initialState를 포함하지 않음.)
bloc 매개 변수가 생략되면, BlocListener는 BlocProvider와 현재 BuildContext를 사용하여 자동으로 룩업을 수행합니다.
BlocListener<BlocA, BlocAState>(
  listener: (context, state) {
    // do stuff here based on BlocA's state
  },
  child: Container(),
)
BlocProvider와 현재 BuildContext를 통해 접근 할 수 없는 블록을 제공하고자 할 때만 Bloc을 지정하십시오.
BlocListener<BlocA, BlocAState>(
  bloc: blocA,
  listener: (context, state) {
    // do stuff here based on BlocA's state
  }
)
listener 함수가 호출 될 때 세밀한 제어를 원하면condition을 BlocListener에 제공 할 수 있습니다. condition은 이전의 블록 상태와 현재의 블록 상태를 취해서 부울을 반환합니다. condition이 true를 반환하면 listener는currentState로 호출됩니다. condition이 false를 반환하면``listener는currentState`와 함께 호출되지 않습니다.
BlocListener<BlocA, BlocAState>(
  condition: (previousState, currentState) {
    // return true/false to determine whether or not
    // to call listener with currentState
  },
  listener: (context, state) {
    // do stuff here based on BlocA's state
  }
  child: Container(),
)
MultiBlocListener 는 여러 개의 BlocListener 위젯을 하나로 합치는 Flutter 위젯입니다. MultiBlocListener는 가독성을 높이고 여러 개의 BlocListeners를 중첩 할 필요가 없습니다. MultiBlocListener를 사용함으로써 우리는 다음과 같이 할 수 있습니다 :
BlocListener<BlocA, BlocAState>(
  listener: (context, state) {},
  child: BlocListener<BlocB, BlocBState>(
    listener: (context, state) {},
    child: BlocListener<BlocC, BlocCState>(
      listener: (context, state) {},
      child: ChildA(),
    ),
  ),
)
to:
MultiBlocListener(
  listeners: [
    BlocListener<BlocA, BlocAState>(
      listener: (context, state) {},
    ),
    BlocListener<BlocB, BlocBState>(
      listener: (context, state) {},
    ),
    BlocListener<BlocC, BlocCState>(
      listener: (context, state) {},
    ),
  ],
  child: ChildA(),
)
RepositoryProvider RepositoryProvider.of<T>(context)를 통해 그 자식에게 저장소를 제공하는 Flutter 위젯입니다. Dependency Injection (DI) 위젯으로 사용되어 저장소의 단일 인스턴스가 하위 트리 내의 여러 위젯에 제공 될 수 있습니다. RepositoryProvider는 리포지토리에만 사용해야하는 반면 BlocProvider는 블럭을 제공하는 데 사용해야합니다.
RepositoryProvider(
  builder: (context) => RepositoryA(),
  child: ChildA(),
);
ChildA에서 우리는Repository 인스턴스를 다음과 같이 검색 할 수 있습니다 :
RepositoryProvider.of<RepositoryA>(context)
MultiRepositoryProvider 는 다수의 RepositoryProvider 위젯을 하나로 합친 Flutter 위젯입니다. MultiRepositoryProvider는 가독성을 높이고 여러 RepositoryProvider를 중첩 할 필요가 없습니다. MultiRepositoryProvider를 사용함으로써 우리는 다음과 같이 할 수 있습니다 :
RepositoryProvider<RepositoryA>(
  builder: (context) => RepositoryA(),
  child: RepositoryProvider<RepositoryB>(
    builder: (context) => RepositoryB(),
    child: RepositoryProvider<RepositoryC>(
      builder: (context) => RepositoryC(),
      child: ChildA(),
    )
  )
)
to:
MultiRepositoryProvider(
  providers: [
    RepositoryProvider<RepositoryA>(
      builder: (context) => RepositoryA(),
    ),
    RepositoryProvider<RepositoryB>(
      builder: (context) => RepositoryB(),
    ),
    RepositoryProvider<RepositoryC>(
      builder: (context) => RepositoryC(),
    ),
  ],
  child: ChildA(),
)
Usage #
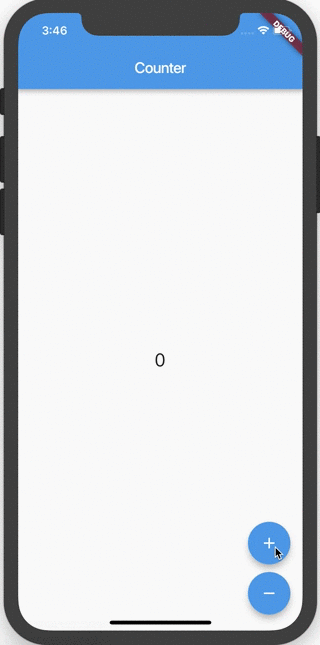
Lets take a look at how to use BlocBuilder to hook up a CounterPage widget to a CounterBloc.
counter_bloc.dart #
enum CounterEvent { increment, decrement }

class CounterBloc extends Bloc<CounterEvent, int> {
  @override
  int get initialState => 0;

  @override
  Stream<int> mapEventToState(CounterEvent event) async* {
    switch (event) {
      case CounterEvent.decrement:
        yield currentState - 1;
        break;
      case CounterEvent.increment:
        yield currentState + 1;
        break;
    }
  }
}
counter_page.dart #
class CounterPage extends StatelessWidget {
  @override
  Widget build(BuildContext context) {
    final CounterBloc counterBloc = BlocProvider.of<CounterBloc>(context);

    return Scaffold(
      appBar: AppBar(title: Text('Counter')),
      body: BlocBuilder<CounterBloc, int>(
        builder: (context, count) {
          return Center(
            child: Text(
              '$count',
              style: TextStyle(fontSize: 24.0),
            ),
          );
        },
      ),
      floatingActionButton: Column(
        crossAxisAlignment: CrossAxisAlignment.end,
        mainAxisAlignment: MainAxisAlignment.end,
        children: <Widget>[
          Padding(
            padding: EdgeInsets.symmetric(vertical: 5.0),
            child: FloatingActionButton(
              child: Icon(Icons.add),
              onPressed: () {
                counterBloc.dispatch(CounterEvent.increment);
              },
            ),
          ),
          Padding(
            padding: EdgeInsets.symmetric(vertical: 5.0),
            child: FloatingActionButton(
              child: Icon(Icons.remove),
              onPressed: () {
                counterBloc.dispatch(CounterEvent.decrement);
              },
            ),
          ),
        ],
      ),
    );
  }
}
At this point we have successfully separated our presentational layer from our business logic layer. Notice that the CounterPage widget knows nothing about what happens when a user taps the buttons. The widget simply tells the CounterBloc that the user has pressed either the increment or decrement button.
Gallery #
 |
 |
 |
|---|---|---|
 |
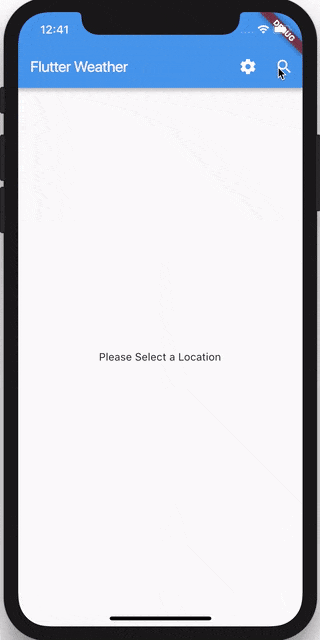 |
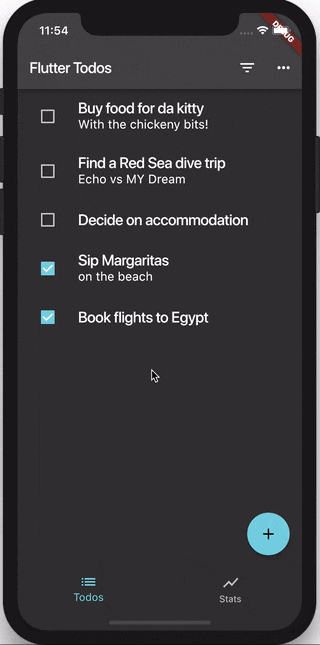 |
Examples #
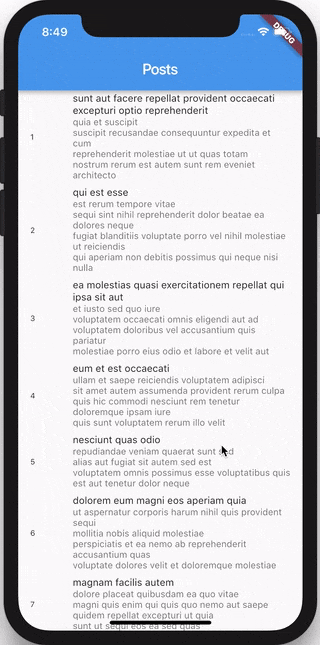
- Counter - an example of how to create a
CounterBlocto implement the classic Flutter Counter app. - Form Validation - an example of how to use the
blocandflutter_blocpackages to implement form validation. - Bloc with Stream - an example of how to hook up a
blocto aStreamand update the UI in response to data from theStream. - Infinite List - an example of how to use the
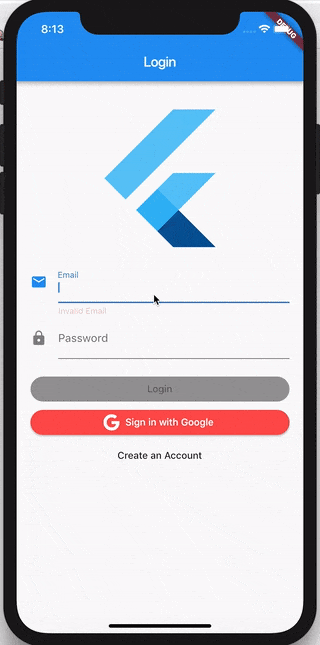
blocandflutter_blocpackages to implement an infinite scrolling list. - Login Flow - an example of how to use the
blocandflutter_blocpackages to implement a Login Flow. - Firebase Login - an example of how to use the
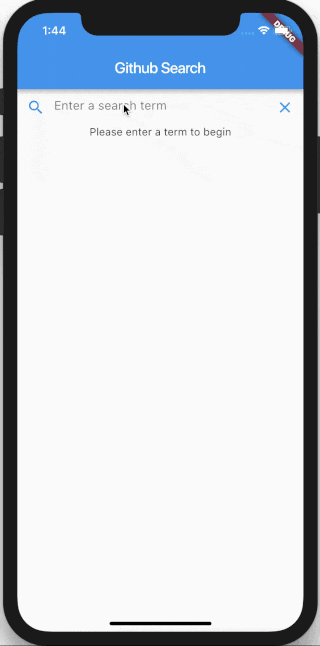
blocandflutter_blocpackages to implement login via Firebase. - Github Search - an example of how to create a Github Search Application using the
blocandflutter_blocpackages. - Weather - an example of how to create a Weather Application using the
blocandflutter_blocpackages. The app uses aRefreshIndicatorto implement “pull-to-refresh” as well as dynamic theming. - Todos - an example of how to create a Todos Application using the
blocandflutter_blocpackages. - Timer - an example of how to create a Timer using the
blocandflutter_blocpackages.
##